Quick picks by rig
Every pick below is no-drill. Find your rig, buy the primary, and keep the backup for campsites where trees block the sky.
| Your rig | Buy this | Why | Backup |
|---|---|---|---|
| Class A or C with a rear ladder | Flagpole Buddy Gen 3 Ladder Kit | Complete kit, raise and aim the dish from the ground | Kickstand or tripod |
| Travel trailer or fifth wheel | EEZ RV Products Hitch Mount | Fits Gen 2, Gen 3 and Mini in a 2 in receiver | Bumper kit if the hitch is in use |
| Class B van | Trio Mini Flatmount | Lowest profile, can stay on while driving | Lymorexan magnetic mount |
| Airstream | 10 to 12 ft bumper or hitch pole | Nothing touches the aluminum shell | Flagpole Buddy suction kit |
| Flat roof, long stays | Trio Gen 3 Standard Flatmount | 4.9 stars across 104 reviews | Tripod |
Not sure your dish fits? Check the compatibility table. Comparing mount types? Jump to the side-by-side comparison.
How we rank mounts
We score every mount on the same five criteria, using manufacturer specs, verified-purchase review patterns, and field reports from r/Starlink and RV owner forums. Compatibility claims are checked against Starlink's official hardware documentation, not seller listings, because Amazon listings often claim "universal" fit the bracket cannot deliver.
| Criteria | Weight | What we measure |
|---|---|---|
| Setup speed | 25% | Time from parked to connected, including stow |
| Wind stability | 25% | Dish retention in 30+ mph gusts and highway travel |
| Compatibility | 20% | Number of Starlink generations supported |
| Cable routing | 15% | How well the mount supports clean cable management |
| Value | 15% | Price relative to build quality and longevity |
Starlink RV mount compatibility: Standard vs Mini vs Standard Actuated
Starlink RV mount compatibility comes down to one question: how does your dish physically attach? Starlink's three RV-relevant dishes each use a different interface, so a mount built for one rarely fits another without the right adapter. Identify your dish first, then shop.
- Starlink Standard (Gen 3 / V4) is the current rectangular kit dish. It has no mast; mounts attach through the kickstand socket on the back, so you need a Standard-specific bracket or Starlink's official Standard Pipe Adapter. According to Starlink's Standard accessories guide, that adapter clamps metal pipe from 31 mm (1.25 in) to 63.5 mm (2.5 in) outside diameter with a minimum 3.6 mm (0.14 in) wall, and it is not rated for PVC.
- Starlink Mini is the compact 1.1 kg (2.43 lb) dish with an integrated kickstand. It needs a Mini-specific bracket or the Mini Pipe Adapter. Third-party Mini brackets usually clamp thinner tube than Standard mounts, for example 0.7 to 1.4 in on the SOZATO multi-mount and 0.8 to 1.97 in on the Koroao ladder clamp.
- Starlink Standard Actuated (Gen 2) is the older self-aiming dish with a built-in mast that drops into a 1.5 in mast socket. It fits Gen 2 mast-socket mounts, not Gen 3 kickstand brackets. Upgrading? Starlink sells a Standard to Standard Actuated Mount Adapter so a new Standard dish can reuse your existing Actuated mounts.
In short: "universal" on an Amazon listing means nothing. Look for your exact dish name in the compatibility line, or buy a kit that lets you choose the adapter at checkout.
Compatibility table: every mount in this guide
| Mount | Type | Standard (Gen 3) | Mini | Standard Actuated (Gen 2) |
|---|---|---|---|---|
| Flagpole Buddy ladder kits | Ladder pole kit | ✓ (Gen 3 kit, $209.99) | ✓ (Mini kit, $209.99) | ✓ (Gen 2 kit, $199.99) |
| wuutyty RV Ladder Mount | Ladder clamp | ✓ | — | — |
| Koroao Mini Ladder Mount | Ladder clamp | — | ✓ | — |
| EEZ RV Products Hitch Mount | Hitch | ✓ | ✓ | ✓ |
| Ybervont Trailer Hitch Kit | Hitch | ✓ | — | — |
| Flagpole Buddy hitch, bumper and suction kits | Pole kit | ✓ | ✓ | ✓ |
| Heavy Duty Stainless 3-in-1 Kit | Frame / hitch / bumper | ✓ | ✓ | ✓ |
| Trio Gen 3 Flatmount and Speedmount | Flat roof | ✓ | — | — |
| Trio Mini Flatmount | Flat roof | — | ✓ | — |
| SSCEHCNY and Neeotyy ridge mounts | Ballasted roof | ✓ | — | — |
| Adjustable Wall/Roof Mount | Wall / roof bracket | ✓ (Gen 3/4/4X) | — | — |
| Lymorexan, SOZATO, Anautin tripod | Magnetic / multi / tripod | — | ✓ | — |
Compatibility is taken from each manufacturer's listing and cross-checked against the dish interface above. Flagpole Buddy sells separate adapters per dish, so a kit bought for a Gen 2 needs a new adapter, not a new pole, when you upgrade.
Best RV mount for Starlink Mini
The best RV mount for Starlink Mini depends on your rig, but the Mini's light weight means almost every no-drill category works. Pick by attachment point:
- Rear ladder: Koroao Mini Ladder Mount for a budget clamp, or the Flagpole Buddy Mini kit ($209.99) if you want poles and ground-level operation included.
- Hitch receiver: EEZ RV Products Hitch Mount (covers all three dishes if you upgrade later), paired with your own metal pole and Starlink's Mini Pipe Adapter.
- Flush roof: Trio Mini Flatmount (from $100), the only option here you can leave on while driving.
- Roof rack, pole or tripod: the SOZATO multi-mount, which clamps 0.7 to 1.4 in tube, or a telescoping tripod for tree-blocked sites.
For vans and small rigs, our Starlink Mini RV setup guide covers power and cable routing for each mount position.
No-drill mount decision framework: choose by rig layout
Before you compare products, decide which type of no-drill mount fits your rig. A no-drill mount is any system that secures your Starlink dish without putting holes in the roof or body — it clamps, slides, sticks, or suctions into place. For the full landscape of options, see our Starlink RV mounting options overview. Choosing the wrong category of mount — not the wrong brand — is the number one reason RV owners end up re-buying.
The bottom line: the best no-drill setup is not a single product. It is a two-layer system — a primary mount matched to your rig geometry, plus a portable fallback for blocked campsites. This pairing consistently beats one-mount-only setups in real travel use.
If your RV has a rear ladder
Start with a ladder mount as your primary. It is usually the cleanest no-drill route for deployment speed and daily consistency — the dish sits elevated for good sky clearance and stows in seconds. See the best RV ladder mounts section below.
If your RV has no rear ladder
Start with a hitch mount as your primary. It gives the best no-drill compatibility path across Class B and Class C layouts that lack a usable ladder. See the best Starlink hitch mounts section. If your hitch receiver is occupied, a 3-in-1 or bumper mount is the next-best route.
If you frequently camp in wooded parks
Do not rely on one fixed position. Campsite obstructions vary widely, so no single fixed mount handles every site. Keep a portable fallback — a lightweight tripod ($20-40) or the included kickstand — so you can relocate the dish to a clearer patch of sky when trees block the signal. Our Starlink RV obstruction tips cover how to find a clear sky window fast at tree-heavy sites.
The setup stack we recommend
For most travelers, this is the highest-confidence configuration:
- Primary no-drill mount — a ladder or hitch mount matched to your rig (see product picks below)
- Portable fallback — a tripod or kickstand for tree-blocked campsites
- Cable routing kit — self-amalgamating tape and weatherproofing, covered in our Starlink RV cable routing guide
- A fixed deploy-and-stow checklist so setup is repeatable on every travel day
Build both layers from day one and your Starlink uptime improves immediately. Still deciding between the two primary types? Our ladder vs hitch mount comparison breaks down the physical fit and workflow trade-offs in detail.
Best RV ladder mounts (no-drill)
The best RV ladder mount is a no-drill clamp that grips your rig's rear ladder rungs and holds the dish elevated for clear sky access. Ladder mounts are the fastest no-drill type to deploy, cost nothing to remove, and need zero roof penetrations. If your rig has a rear ladder, start here — for most travelers the best RV ladder mount is also the best no-drill Starlink RV mount overall.
Top pick: Flagpole Buddy Gen 3 Starlink Kit
The community gold standard. Flagpole Buddy has been making RV ladder-mount systems since 2004 (US patents #7618015 and #7789369). The Starlink kit includes the dish adapter, telescoping poles, ladder mounts, cable clamps, pole strap, and carry bag. Everything needed for a complete install.
- Compatibility: Gen 3 Standard (separate kits for Gen 2 at $199.99 and Mini at $209.99)
- Setup time: Under 2 minutes once the one-time ladder bracket is installed
- Key advantage: Patented pole-holding system — operate from ground level, never climb the ladder
- Community note: Survived 60+ mph storms and full-season highway use per multiple r/Starlink reports
Pros: Complete kit, fastest deployment, strongest community track record, works from ground level
Cons: Ladder-specific (requires rear RV ladder), higher price than Amazon clamp-only options
Our top pick · ladder rigs

FlagPole Buddy Gen 3 RV Ladder Mount Kit
Mount
$209.95
Amazon price when we checked on Oct 9, 2026
Check today's price on Amazon(opens Amazon in a new tab)Budget alternative: wuutyty Starlink RV Ladder Mount
- Compatibility: Gen 3
- Material: Aluminum
- Fit range: 0.8–1.17 in ladder rungs
- Best for: Budget ladder installs where you already have a pole or plan to DIY one
A clamp-only option that bolts to ladder rungs without drilling. Does not include a pole, bag, or cable management — bring your own. Works well paired with a $10-15 conduit pole from a hardware store.
For Mini: Koroao ladder clamp or SOZATO multi-mount
- Koroao Starlink Mini Ladder Mount ($43–52): a dedicated Mini ladder clamp for 0.8–1.97 in rungs, a wider range than the typical 1.17 in maximum.
- SOZATO Starlink Mini Mount (about $54): an aluminum frame with a 0.7–1.4 in pipe clamp plus bolt and wall-anchor options, so the same bracket moves from ladder to roof rack or bumper. Mini only. Full details are in the magnetic and multi-mount section below.

wuutyty Starlink Gen 3 RV Ladder Mount
Ladder Mount
$39.99
Amazon price when we checked on Oct 9, 2026
Check today's price on Amazon(opens Amazon in a new tab)
Koroao Starlink Mini RV Ladder Mount
Ladder Mount
$45.01
Amazon price when we checked on Oct 9, 2026
Check today's price on Amazon(opens Amazon in a new tab)The EDUP LOVE ladder mount we used to list here, which also fit the Gen 2 (Standard Actuated) dish, is no longer available. Gen 2 owners can use the Flagpole Buddy Gen 2 kit or the EEZ hitch mount instead.
Other ladder mounts worth considering
| Product | Dish | Material | Fit Range | Link |
|---|---|---|---|---|
| Starlink RV Ladder and Roof Rack Mount Kit | Gen 3 | — | 0.8–1.17 in | Amazon |
| Gen 3 Starlink Mount for RV Ladder and Roof Rack | Gen 3 | — | Adjustable | Amazon |
| Koroao Starlink Mini Mount RV Ladder | Mini | Aluminum alloy | 0.8–1.97 in | Amazon |
Tip: Before buying any ladder clamp, measure your ladder rung diameter with calipers. Most RV ladders are 1.0–1.25 in round tubing, but some use square or oversized rails that clamp-style mounts cannot grip.
Best Starlink hitch mounts for an RV
The best Starlink hitch mount for an RV is the EEZ RV Products Hitch Mount — the most versatile pick because it fits Gen 2, Gen 3, and Mini in a standard 2-inch receiver. For a Gen 3-only build, the Ybervont Trailer Hitch Mounting Kit is the cheaper route because it ships with the mast included. A hitch mount is the best RV hitch mount route for any rig without a usable rear ladder. Not sure which type to buy? Our ladder vs hitch mount comparison breaks down the physical fit and workflow trade-offs.
Hitch mounts slide into a standard 2-inch trailer hitch receiver. They work on any rig with an available receiver — travel trailers, fifth wheels, Class A/B/C motorhomes with rear hitches, or tow vehicles.
Top pick: EEZ RV Products Hitch Mount Starlink Pole and Flagpole Holder
- Compatibility: Gen 2, Gen 3, Mini
- Fit: 2 in receiver, supports up to 2.5 in pole diameter
- Best for: Owners who want one hitch mount that works with any Starlink dish
The widest compatibility in the hitch mount category. Accepts poles up to 2.5 inches in diameter, which means it works with the Starlink pipe adapter as well as standard flagpole and conduit setups. The three-generation support means you can upgrade your dish without replacing the mount.
Our top pick · hitch receivers

EEZ RV Starlink Hitch Pole Mount
Hitch Mount
$75.00
Amazon price when we checked on Oct 9, 2026
Check today's price on Amazon(opens Amazon in a new tab)Pros: All-generation support, wide pole tolerance, doubles as flagpole holder when not using Starlink
Cons: Premium pricing, pole not included (bring your own or buy separately)
Cheaper Gen 3 option: Ybervont Starlink Trailer Hitch Mounting Kit
- Compatibility: Gen 3
- Material: Stainless steel mast
- Fit: 2 in receiver
- Best for: Gen 3 owners who want a stainless-only kit for maximum corrosion resistance
All-stainless construction makes this the best hitch option for coastal and high-humidity environments.
Complete hitch pole kit: Flagpole Buddy Hitch Kit — $230.99
- Compatibility: Gen 2, Gen 3, or Mini (choose the adapter at checkout)
- Includes: Receiver mount, dish adapter, sectional aluminum poles, cable clamps, pole bag
- Dish height: Roughly 13 ft above the receiver, per a two-month field review
- Best for: Travel trailer and fifth wheel owners who want the pole included rather than sourced separately
This is the hitch mount to buy if you do not want to think about pole diameters. The same review reports ground-level deployment in under five minutes. It costs more than a DIY build from the EEZ mount, two mast sections and a J-pole adapter (roughly $140 to $200 in parts), but every part is matched and the poles stow in short sections.
Starlink hitch mount comparison
| Hitch mount | Dishes | Pole included | Price | Pick it if |
|---|---|---|---|---|
| EEZ RV Products Hitch Mount | Gen 2, Gen 3, Mini | No (accepts up to 2.5 in) | $60–$100 | You want one mount for any dish |
| Ybervont Trailer Hitch Kit | Gen 3 | Yes, stainless mast | Budget | You own a Gen 3 and camp near salt air |
| Flagpole Buddy Hitch Kit | Gen 2, Gen 3, Mini | Yes, sectional aluminum | $230.99 | You want a complete, matched kit |
Before you buy any hitch mount
- Confirm a 2 in receiver. Every mount above is built for 2 in (Class III or IV) receivers. A 1.25 in receiver needs a reducer that adds leverage and wobble.
- Kill the rattle. A pole multiplies any play in the receiver into dish sway at the top. An anti-rattle hitch clamp or a threaded hitch pin keeps the mast steady in gusts.
- Check the receiver is free. If a bike rack or cargo carrier lives there, go straight to a bumper kit.
- Plan the cable run. A hitch mount puts the dish behind the rig, so budget cable length for the run to your entry point.
Mini-specific hitch mounts
We no longer list a Mini-only hitch kit. The Aspotify Mini hitch kit we used to recommend is unavailable, and the remaining Mini-specific kits have too few reviews to judge. For a Mini on a hitch, use the EEZ RV Products Hitch Mount with your own metal pole and Starlink's Mini Pipe Adapter, or the Flagpole Buddy Hitch Kit with its Mini adapter.
Important hitch mount note: Always remove your hitch-mounted pole before driving. Single-pivot poles do not survive highway wind at 60+ mph. This is the number one hitch mount mistake reported in RV forums.
Best 3-in-1 mounts (frame, hitch, and bumper)
A 3-in-1 mount is a single kit that ships with brackets for three attachment points — a frame rail, a 2 in hitch receiver, and a bumper — so one purchase covers whichever one your rig actually offers. They are the most versatile option when you are not sure which mounting point you will use, and the safest buy if you are shopping before the RV is in your driveway.
They also solve a problem the dedicated categories cannot: relocation. If your first mounting spot turns out to shadow the dish behind an A/C shroud or a roof rack, you move the bracket instead of buying a second mount. The trade-off is that a 3-in-1 is never quite as rigid as a purpose-built hitch mount at the same price, and the bumper bracket in particular assumes a standard 4 in square RV bumper tube. Measure yours before ordering.
Why we no longer name a top pick here
This is the one category on this page where we cannot recommend a clear winner, and it is worth being blunt about why.
The best-known 3-in-1 kit — the EEZ RV frame/hitch/bumper mount — sits at 3.4 stars across 30 reviews. We recommended it here previously on the strength of the concept rather than the feedback, and that was a mistake. The complaints are consistent and structural: flex at the bracket under a Gen 3's weight and wind load, which is exactly the failure mode a multi-purpose bracket is prone to.
The stainless alternative below rates better at 4.7, but on five reviews — not enough to stand behind.
What to buy instead. If you want a hitch mount, buy a hitch mount; the dedicated EEZ hitch mount above rates 4.6 and is more rigid at a similar price. If you want relocation flexibility, an adjustable wall/roof bracket does that job with far more feedback behind it:

Adjustable Wall/Roof Mount for Starlink Standard Gen 3/4/4X
Mount
Adjustable bracket with the aluminium pipe adapter included, so it clamps to a wall, roof edge, or pole without buying a separate adapter. The most-reviewed Starlink mount on Amazon by a wide margin.
$28.49
Amazon price when we checked on Oct 9, 2026
Check today's price on Amazon(opens Amazon in a new tab)At 4.6 stars across nearly 1,400 reviews, this is the most-reviewed Starlink mount on Amazon, and the aluminium pipe adapter is included rather than sold separately.
Stainless alternative: Heavy Duty Stainless Steel 3-in-1 Mount Kit
- Compatibility: Gen 2, Gen 3, Mini
- Material: Stainless steel
- Fit: Up to 2.5 in pole
- Best for: Coastal or high-humidity environments where corrosion resistance matters
Same versatility as the EEZ RV Products kit but in all-stainless construction. Choose this if you camp near salt water or store your RV outdoors year-round.
Best flat roof mounts (no drill)
A no-drill flat roof mount is a mount that holds the dish flush to the roof using magnets, VHB adhesive, or counterweights instead of screws — so the factory roof membrane is never punctured and the warranty stays intact. They keep the dish at the lowest possible profile for minimal wind drag during transit, which is why they are the only no-drill category most owners will leave installed while driving.
The trade-off is flexibility. A flat mount fixes the dish in one position, so a tree-heavy site has no answer other than unmounting the dish entirely. Roof material also decides your options before price does: magnets need steel, VHB needs a clean flat panel, and ballasted sleds need a defined roof ridge. Identify your roof material first, then pick from the options below.
Best no-drill roof mounts on Amazon (ballasted)
The most affordable no-drill Starlink RV mount for a roof peak is a ballasted ridge mount: it clamps over the roof ridge and uses counterweights instead of screws, so the rubber roof seal stays intact. These are the best pick if you want a permanent, low-profile roof setup without direct-to-consumer pricing. Both options below ship with 13 lb counterweights and a pipe adapter for the Gen 3 dish.

SSCEHCNY Gen 3 Roof Ridge Mount (13 lb counterweights)
Sled Mount
Non-penetrating ridge clamp design with included 13 lb counterweights — installs on RV or trailer roof peaks with zero drilling, preserving the rubber roof seal.
$104.45
Amazon price when we checked on Oct 9, 2026
Check today's price on Amazon(opens Amazon in a new tab)
Neeotyy No-Drill Gen 3 Roof Mount (13 lb counterweight)
Sled Mount
Ballasted no-drill mount for ridge or flat roofs with pre-integrated 13 lb counterweight panel and pipe adapter — ideal for RVs that can't risk roof penetrations.
$104.49
Amazon price when we checked on Oct 9, 2026
Check today's price on Amazon(opens Amazon in a new tab)For a deeper look at ballasted, non-penetrating designs, see our non-penetrating Starlink sled mount guide.
Top pick: Trio Gen 3 Standard Flatmount — from $150
- Compatibility: Gen 3 Standard
- Rating: 4.9 stars (104 reviews)
- Attachment: Magnetic or VHB adhesive options
- Best for: Permanent low-profile roof mounting without drilling
The most reviewed and highest-rated Starlink flat mount available. Trio is the original Starlink mount brand — trusted by overlanders, rescue teams, and RV owners since the early Starlink days. 447 total reviews across their product line with a 4.91 average.
Choose magnetic for steel roofs or adhesive for fiberglass and aluminum. Free shipping on orders over $175.
Pros: Lowest profile, excellent reviews, no wind resistance during travel, stays mounted while driving
Cons: Roof access required for initial install, magnetic version only works on metal roofs
For Starlink Mini: Trio Mini Flatmount — from $100
- Rating: 4.82 stars (17 reviews)
- Best for: Mini owners who want a permanent, flush roof mount
The Mini weighs just 1.1 kg (2.43 lbs) — light enough for magnetic or adhesive mounting with no concerns about wind lift at highway speeds. Community reports confirm stable hold at 80+ mph.
Speedmount option: Trio Gen 3 Standard Speedmount — from $275
- Rating: 4.95 stars (95 reviews)
- Best for: Owners who want quick on/off capability with flat mount convenience
The Speedmount adds a quick-release mechanism to the flat mount concept. Click in, click out. Best for owners who remove the dish at each stop rather than leaving it roof-mounted.
Trio mounting accessories and prices
| Accessory | Purpose | Price |
|---|---|---|
| Rubber Coated Magnets | Magnetic attachment to metal roofs | $40 |
| VHB Adhesive Landing Pads | Adhesive attachment for fiberglass roofs | $50 |
| VHB Adhesive Backed Magnet Discs | Magnetic + adhesive hybrid | $40 |
| Heavy Duty Suction Cup Mounts | Temporary suction attachment | $200 |
| Standard Suction Cups | Basic suction attachment | $99 |
| Swivel Leg Mount Adapters | Angle adjustment for sloped roofs | $70 |
| Kickstand Release Lever | Quick-release for Starlink kickstand | $15 |
Best Starlink RV pole kits for RVers and Airstreams
The best Starlink RV pole kit for most RVers is a complete Flagpole Buddy kit matched to your attachment point: ladder, hitch, bumper, or Airstream suction cups. A pole kit is a bundle of the mast, the dish adapter, and the bracket that holds the mast to your rig, sold together so the diameters already match. That matters because a mismatched pole and adapter is the most common reason a Starlink pole mount wobbles or slips.
Starlink RV pole kit comparison
| Pole kit | Attaches to | Dishes | Price | Best for |
|---|---|---|---|---|
| Flagpole Buddy Ladder Kit | Rear ladder rungs | Gen 3, Gen 2, or Mini (separate kits) | $199.99–$209.99 | Class A and C rigs with a ladder |
| Flagpole Buddy Hitch Kit | 2 in receiver | Gen 2, Gen 3, Mini | $230.99 | Travel trailers and fifth wheels |
| Flagpole Buddy Bumper Kit | Rear bumper tube | Gen 2, Gen 3, Mini | $220.99 | Rigs with an occupied receiver |
| Flagpole Buddy Airstream Suction Cup Kit | Two 6 in suction cups | Gen 2, Gen 3, Mini | From $314.99 | Airstreams and smooth shells |
| DIY: EEZ hitch mount + 2 x 5 ft mast + J-pole adapter | 2 in receiver | Any, with the right adapter | ~$140–$200 in parts | Budget builds and tinkerers |
The bottom line: buy the Flagpole Buddy kit for your attachment point if you want it to work the first night. Build the DIY version if you are comfortable sleeving mast joints and guying a pole.
What separates a good pole kit from a bad one
- Sectional, not telescoping. Flagpole Buddy uses 2 in diameter aluminum sections in 4 ft lengths, which cannot collapse under load or seize with grit. Cheap twist-lock telescoping poles do both.
- Ground-level operation. The best RV pole kits let you raise and aim the dish without climbing the ladder, which is the main reason owners stay with them.
- Storage length. 4 ft sections fit a pass-through bay. A one-piece 10 ft mast does not.
- Guying points. Anything over about 10 ft carrying a Standard dish needs a guy line in wind. Our Starlink pole mount height guide covers the height and guying math.
Best Starlink pole kit for Airstream trailers
For Airstreams, the best Starlink pole kit is the Flagpole Buddy Airstream Suction Cup Kit (from $314.99) when you have no rear receiver, or the Flagpole Buddy Hitch Kit when you do. The suction kit uses two 6 in cups, each with a built-in vacuum pump and a visual vacuum indicator, so you can see a cup losing grip before it lets go. One Airforums owner reported the cups holding for four straight days in hot, humid weather.
The trade-off is the finish. Grit trapped under a suction cup can scuff a polished or clear-coated shell, so wipe the panel clean before every deploy. Full Airstream sizing and clamp options follow in the next section.
Best Starlink pole for Airstream trailers (no drill, no roof penetration)
The best Starlink pole for an Airstream trailer is a 10 to 12 ft bumper or hitch-receiver pole if your rig has a rear 2 in receiver, or a 4 to 6 ft pole on a suction-cup shell kit if it does not. Airstreams are the hardest RV shape to mount a dish on, and almost every generic "no-drill RV mount" fails on one for the same three reasons.
Why standard no-drill mounts do not work on an Airstream:
- The shell is curved on every axis. Airstream's riveted Alclad aluminum body has no flat roof panel wide enough for a ballasted sled mount, a flat mount, or a VHB landing pad to sit square. Ballasted ridge mounts like the SSCEHCNY and Neeotyy kits above need a defined roof ridge — an Airstream does not have one.
- Aluminum is non-ferrous. Magnets do not stick to an Airstream, period. This kills every magnetic mount on the market unless you first bond ferrous discs to the shell, which most owners refuse to do on a polished skin.
- Most Airstreams ship with no rear ladder. The roof-access ladder is a factory option on Classic and some 30 ft floorplans, not standard equipment. That removes the default no-drill route — the ladder clamp — for the majority of trailers.
What is left is pole mounting, and that is genuinely the right answer rather than a consolation prize. A pole puts the dish above the shell crown, keeps every fastener off the aluminum, and comes down in under a minute for travel.
Pole height: size it from the shell crown, not the ground
Airstream exterior heights run roughly 9 ft 3 in to 10 ft depending on floorplan (Bambi and Caravel sit lowest, Classic highest — check your model's spec sheet on Airstream's official trailer specifications). Your pole needs to clear that crown plus a margin for the dish to see past the trailer's own roof line.
| Attachment point | Height off ground | Pole length needed | Dish height achieved |
|---|---|---|---|
| Rear bumper / hitch receiver | ~1.5–2 ft | 10–12 ft | 11.5–14 ft |
| Suction cups on upper shell shoulder | ~7–8 ft | 4–6 ft | 11–14 ft |
| Ground tripod beside the trailer | 0 ft | 12–15 ft | 12–15 ft |
The bumper route is the most common and the cheapest. The suction route wins when the receiver is occupied or the site is too tight to swing a 12 ft pole. For the full height math including tree-line clearance, see our Starlink pole mount height guide.
Pole diameter: match the Starlink Pipe Adapter
This is where most Airstream owners buy the wrong part. Starlink's own Standard Pipe Adapter is rated for metal pipe from 1.25 to 2.5 in (31 to 63.5 mm) outside diameter with a wall of at least 3.6 mm (0.14 in). The cheap galvanized antenna masts sold for RV use are commonly 1.25 in OD, which sits at the very bottom of that window, and light-gauge antenna masts are typically thinner-walled than Starlink's minimum.
Two ways to solve it:
- Buy in the middle of the adapter's range. A 1.5 to 2 in OD heavy-wall steel or aluminum pole clamps with margin to spare. Skip PVC, which Starlink does not rate for the adapter. The EEZ RV Products hitch mount accepts poles up to 2.5 in, so it covers the whole range.
- Use a J-pole combo with a 1.25 in mast. A pipe adapter and J-pole kit gives the narrower mast a proper dish interface.

5 ft Galvanized Steel Antenna Mast (1.25 in OD)
Mount
$25.00
Amazon price when we checked on Oct 9, 2026
Check today's price on Amazon(opens Amazon in a new tab)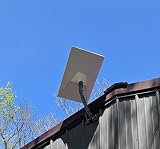
Starlink Gen 3 Pipe Adapter + J-Pole Combo Kit
Pipe/Pole Mount
All-in-one pipe adapter and J-pole mount for Gen 3 dish with two height configurations, fits standard antenna masts on RVs.
$50.00
Amazon price when we checked on Oct 9, 2026
Check today's price on Amazon(opens Amazon in a new tab)Two 5 ft mast sections give you a 10 ft pole for the bumper route. Sleeve the joint and guy the pole at the halfway point if you are staying more than a night — an unguyed 12 ft pole carrying a Gen 3 dish will oscillate noticeably in a 20 mph crosswind.
Clamp options that never touch the aluminum
- Hitch receiver pole mount — if your Airstream has the optional rear 2 in receiver, this is the cleanest and stiffest attachment. Same hardware as the hitch mounts above.
- Bumper clamp — the Flagpole Buddy Bumper Kit ($220.99) clamps the rear bumper tube, which is the fallback when the receiver is occupied or absent.
- Suction-cup shell kit — the Flagpole Buddy Airstream kit (below) uses multiple cups placed on the upper shoulder, where the shell curvature is gentlest and the cups can seat flat. Clean and dry the panel first; road film is the number one cause of a cup releasing overnight.
- Ground pole or tripod — fully decoupled from the trailer, and the only option that lets you walk the dish 30 ft away to dodge a tree.

Anautin Starlink Mini Telescoping Tripod Mount
Mount
$31 – $38
Amazon price when we checked on Oct 9, 2026
Check today's price on Amazon(opens Amazon in a new tab)What to avoid on an Airstream: VHB adhesive pads on a polished shell (semi-permanent and a clearcoat risk on Classic-grade skins), any magnetic mount without bonded steel discs, and driving with the pole up. An Airstream's low drag coefficient is one of its selling points — a 12 ft pole on the bumper erases it and will bend at highway speed.
Best suction cup and specialty mounts
Suction and specialty mounts cover the rigs the mainstream categories miss — curved aluminum shells, smooth-sided fiberglass bodies, occupied hitch receivers, and vehicle rather than RV installs. They cost more per unit than a ladder clamp because the attachment engineering is doing more work, but for an Airstream or a smooth-body Class B they are often the only no-drill route that holds. Every option in this section is fully reversible: nothing here leaves a mark, a hole, or a residue on the body.
For Airstreams: Flagpole Buddy Airstream Suction Cup Kit — from $314.99
- Compatibility: Gen 2, Gen 3, Mini
- Best for: Airstreams and curved aluminum shells where ladder mounts do not fit
Includes suction mounts, adapter, poles, cable clamps, and bag. The suction system is designed for the curved Airstream body that flat mounts and clamp mounts cannot grip.
General suction cup kit: Flagpole Buddy Suction Cup Kit — from $309.99
- Compatibility: Gen 2, Gen 3, Mini
- Best for: Any smooth-bodied rig where no permanent attachment is wanted
Bumper mount: Flagpole Buddy Bumper Kit — $220.99
- Compatibility: Gen 2, Gen 3, Mini
- Best for: Rigs where the hitch receiver is occupied by a bike rack, cargo carrier, or tow bar
Mini sunroof mount: Flagpole Buddy Sunroof Mount — $109.99
- Compatibility: Mini only
- Best for: Vehicle (not RV) use where the Mini sits in a sunroof opening
Sunroof heat warning: Community reports confirm the Mini can overheat in closed sunroofs during summer. Keep the sunroof cracked open or use an exterior mount in temperatures above 85°F.
Mini magnetic mount: Lymorexan Magnetic Roof Mount
- Compatibility: Mini
- Best for: Budget magnetic mounting on steel roofs (or any roof with bonded steel discs)
An affordable alternative to the Trio system for Mini owners with metal roofs. The Mini's 1.1 kg weight makes magnetic mounting viable even with basic magnets.
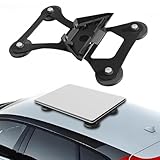
Lymorexan Magnetic Roof Mount (Mini)
Magnetic Mount
$39.98
Amazon price when we checked on Oct 9, 2026
Check today's price on Amazon(opens Amazon in a new tab)Magnetic mounts only grip ferrous metal, so on their own they won't hold on fiberglass or aluminum (Airstream) roofs. The Mob Armor MobNetic steel discs fix that — bond the 3M VHB-backed discs to the roof to give any magnetic mount a ferrous anchor point.

Mob Armor MobNetic Steel Mounting Plates (6-pack)
Mount
$35.99
Amazon price when we checked on Oct 9, 2026
Check today's price on Amazon(opens Amazon in a new tab)Mini multi-mount: SOZATO Starlink Mini Mount
A versatile no-drill option for Starlink Mini owners. The SOZATO aluminum-frame mount supports single-pipe, double-pipe, clamp, and bolt installation and fits poles from 0.7 to 1.4 in, so it adapts to a roof rack, ladder, bumper, or pole without drilling. At 4.8 stars across 78 reviews it is the highest-rated Mini multi-mount we track.

SOZATO Starlink Mini Multi-Mount (aluminum frame)
Mount
$50.98
Amazon price when we checked on Oct 9, 2026
Check today's price on Amazon(opens Amazon in a new tab)Flagpole Buddy Side Arm 360 — $139.99
- Compatibility: Mini
- Best for: Side-mounted Mini installations with 360° rotation
Quick comparison: all mount types
Here is every no-drill category in one table, with the price range and dish compatibility we verified across the products above. Read it as a shortlist filter rather than a ranking — the right row for you is decided by your rig's geometry, not by which line looks best on paper. Price ranges span the budget Amazon clamp at the low end and the complete direct-to-consumer kit at the high end within each category.
Setup times assume the one-time bracket or bracket install is already done and reflect deploy-and-stow at a campsite, which is the number that actually matters when you arrive somewhere at dusk.
| Mount type | Best for | Price range | Setup time | Gen 2 | Gen 3 | Mini |
|---|---|---|---|---|---|---|
| Ladder | RVs with rear ladder | $20–$210 | 1–3 min | ✓ | ✓ | ✓ |
| Hitch | Any rig with 2 in receiver | $30–$231 | 2–5 min | ✓ | ✓ | ✓ |
| 3-in-1 | Uncertain mounting point | $30–$80 | 3–5 min | ✓ | ✓ | ✓ |
| Flat roof | Permanent low-profile | $100–$350 | 10–20 min (one time) | ✓ | ✓ | ✓ |
| Suction cup | Airstreams / curved shells | $99–$315 | 3–5 min | ✓ | ✓ | ✓ |
| Bumper | Occupied hitch | $221 | 2–5 min | ✓ | ✓ | ✓ |
| Magnetic | Metal roofs (Mini only) | $40–$100 | 1 min | — | — | ✓ |
Buyer's checklist before purchasing
Run through this list before adding anything to your cart:
- Measured ladder rung diameter (if ladder mount) — need calipers, not tape measure
- Confirmed hitch receiver size (if hitch mount) — must be 2 in, not 1.25 in
- Identified roof material (if flat/magnetic mount) — steel, aluminum, or fiberglass. Aluminum and fiberglass both rule out magnets
- Measured pole outside diameter (if pole mount) — the Starlink Pipe Adapter is rated for 1.25 to 2.5 in OD metal pipe with a 3.6 mm minimum wall, and thin 1.25 in masts are better served by a J-pole adapter
- Checked dish compatibility — Gen 2, Gen 3, or Mini (not interchangeable on most mounts)
- Planned cable entry point — mount location determines cable path, which determines entry point
- Packed a fallback — kickstand or lightweight tripod for tree-blocked sites
- Checked insurance coverage — your mount type (permanent vs portable) affects whether RV insurance covers your Starlink dish
Five mistakes that cost RV owners money
- Buying a mount before measuring — a $30 clamp that does not fit your 1.3 in ladder rung is $30 wasted
- Choosing the cheapest Amazon option — unbranded mounts without reviews have the highest return and failure rates
- Leaving the hitch pole up while driving — highway winds will bend or snap a single-pivot pole
- Ignoring cable routing in mount choice — some mounts make clean cable paths impossible
- Skipping the fallback — one tree-heavy campsite with no backup turns your Starlink into a paperweight
What to do next
- Deep dive into ladder vs hitch trade-offs in Ladder vs hitch mount for Starlink RV — that post covers the head-to-head comparison; this one covers which no-drill product to buy
- Pick the right pole height in Starlink pole mount height for RV
- See the full landscape of attachment points in Starlink RV mounting options
- Plan your full install with Gen 3 RV accessory checklist
- Route your cable reliably with Starlink RV cable routing guide
- Compare Gen 3 vs Mini for your RV in Starlink Mini vs Gen 3 for RV
Related reading
- Non-penetrating Starlink sled mounts for RVs
- Ladder vs hitch mount for Starlink RV
- Gen 3 RV accessory checklist
- Starlink RV cable routing guide
- Starlink Mini vs Gen 3 for RV
Affiliate disclosure
This page may include affiliate links. If you purchase through them, we may earn a commission at no extra cost to you.